1- MOHID's Payment Gateway Integration:
Please go through the following steps to Set-up Payment gateway and do account association (tying together donation categories/Modules with Bank accounts)
Step # 1. Create COA:
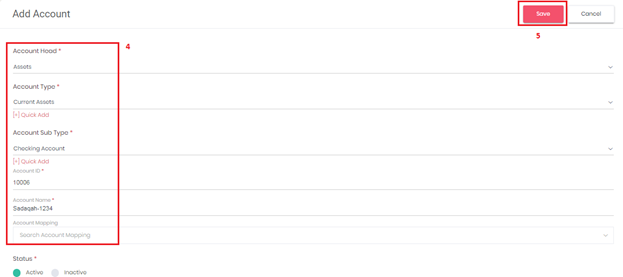
Go to Dashboard > Click on Financials > COA (chart of account) > Add Account

Make selection as under:
- Account Head: Assets
- Account Type: Current Assets
- Account Sub Type: Checking Account
- In Account Name, you can write for e.g. SADAQA-xxxx (xxxx are the last 4 digits of your Bank account where you want to send all transaction for the said category)
- Once all details are updated click Save
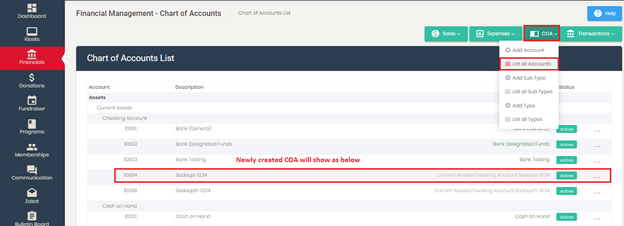
Newly created COA can be seen by going to COA > List all Accounts.
Step # 2. Payment Gateway Integration:
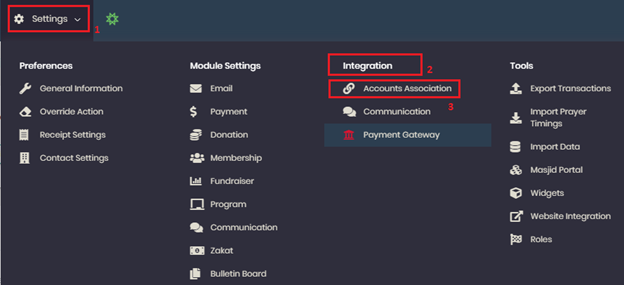
Go to Settings > Integration > Payment Gateway
- Here you need to enter the credentials for new Bambora account (as explained later).
- Select the required bank name in Bank Account. Use the ‘Add Bank’ to enter details for additional account.
- Please make sure that you pick correct bank from Bank Account drop down menu (here you will see recently created accounts, that you made in chart of accounts ---- referring to step 1)
- Click SAVE.
Also make sure that 'Is Live' option is enabled to process the transaction.
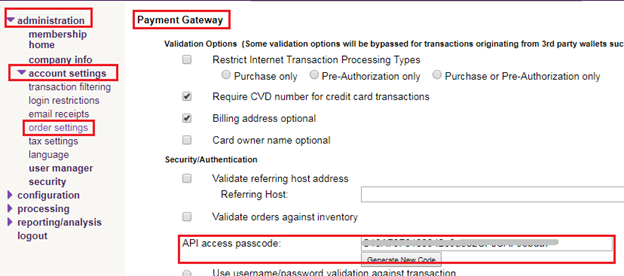
1. Transaction/Payment API KEY: Go to the Administration > Account settings > Order Settings > Payment Gateway > Security/Authentication > API access passcode.
In MOHID's Payment Gateway, it will go under Transaction/Payment API KEY.
2. Profile API KEY: Go to the Configuration > Payment Profile Configuration > Security Settings > API access passcode. (Click on generate new code) > Click Update button (available at the bottom of the same screen).
In MOHID's Payment Gateway, it will go under Profile API KEY.

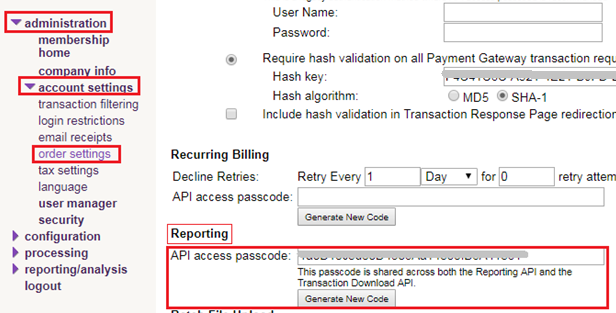
3. Bambora Reporting API KEY: Go to the Administration > Account settings > Order Settings > Reporting > API access passcode (Click on generate new code) > Click Update button (available at the bottom of the same screen).
In MOHID's Payment Gateway, it will go under Reporting API KEY.
Step # 3. Modules/Categories Association:
Lastly, you need to associate the Module or Donation categories to the required bank account. For this please follow below steps:
Go to Settings > Integration > Account Association >
For any Module or Donation Category > Select category and associate with correct bank (created in Chart of Accounts)
Once the setup is done, please click on SAVE button at the bottom of screen.

2- Bambora Account's Configuration:
Please update following settings in your Bambora Account to ensure successful payment processing:
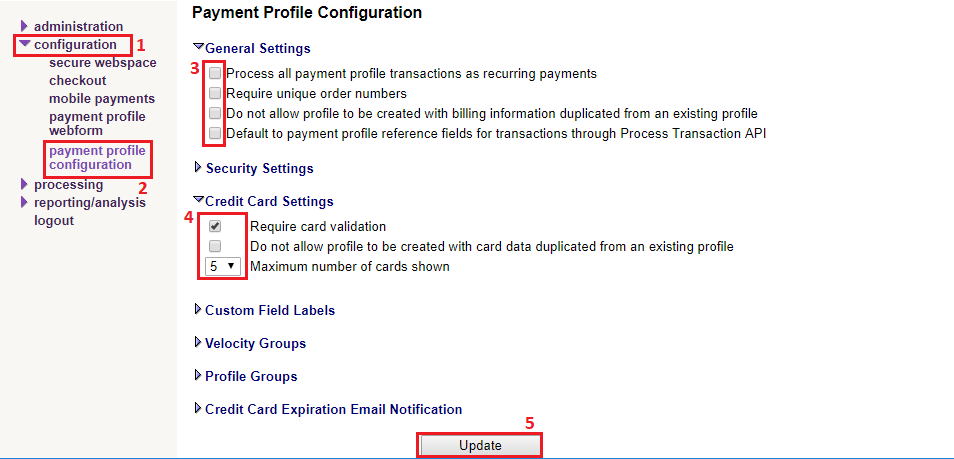
1. Go to Configuration > Payment Profile Configuration screen:
A- In General Settings: Make sure the settings highlighted in the below image are unchecked.
B- In Credit Card Settings section:
- Un-Check the option 'Do not allow profile to be created with card data duplicated from an existing profile'
- 'Maximum number of cards shown' should be set to 5.
- Click on Update
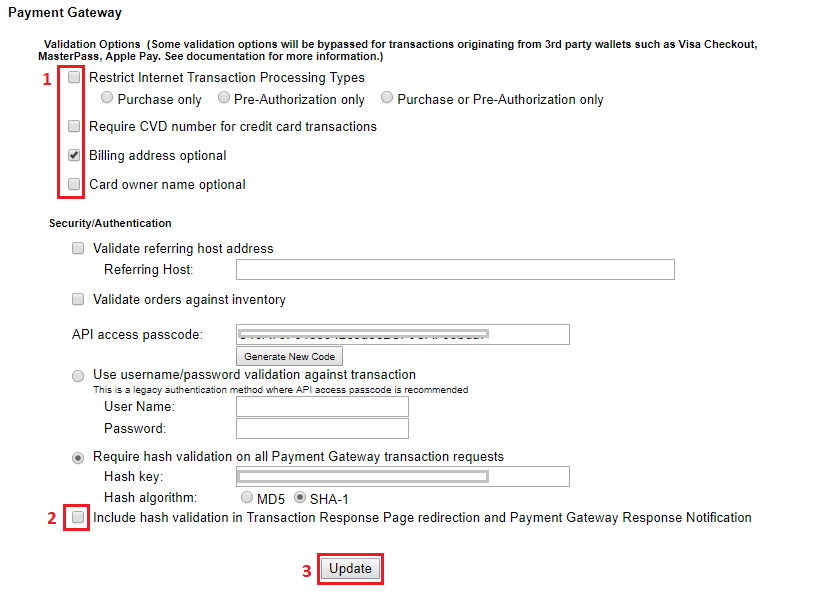
2. Go to Administration > Account Settings > Order Settings screen:
A- In Payment Gateway > Validation Options section: Make sure this section is updated as per the settings highlighted in the below image.
B- In Security/Authentication section:
- Un-check the checkbox for "Include hash validation in Transaction Response Page redirection and Payment Gateway Response Notification".
- Click on Update.
When you complete this, please run test transactions to verify successful payment processing in your respective bank accounts.
